You’ve got many different options for watering your landscape and garden. In fact, irrigation systems range from inexpensive manual methods to fully automated in-ground sprinkler systems you can set and forget. Water-conserving irrigation systems are available, too.
This guide to lawn sprinklers assesses each option including installation methods, costs, and pros and cons.
When it is applicable for the type of sprinkler system considered, we also provide tips on design and equipment selection.
In-ground Sprinkler Systems in a Nutshell
An in-ground or underground sprinkler system remains the most popular type for homeowners committed to a gorgeous landscape. They are chosen for their convenience and the even irrigation they deliver when properly designed and installed.
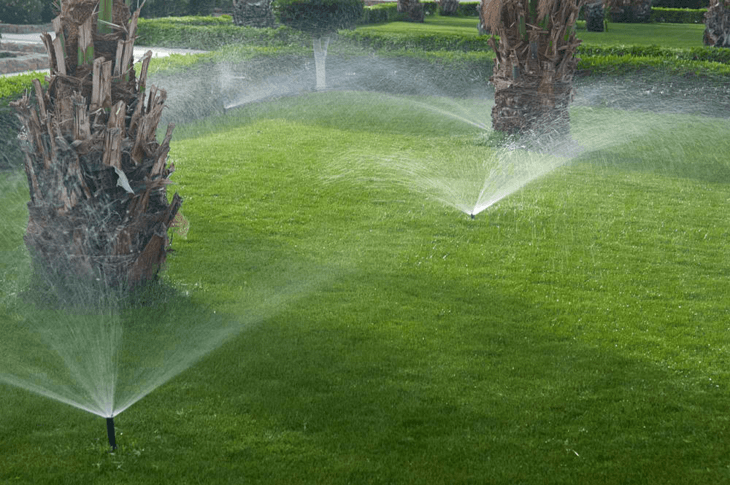
Automated inground sprinklers arrogating a landscape.
This system offers the most convenience, but the cost is higher than others.
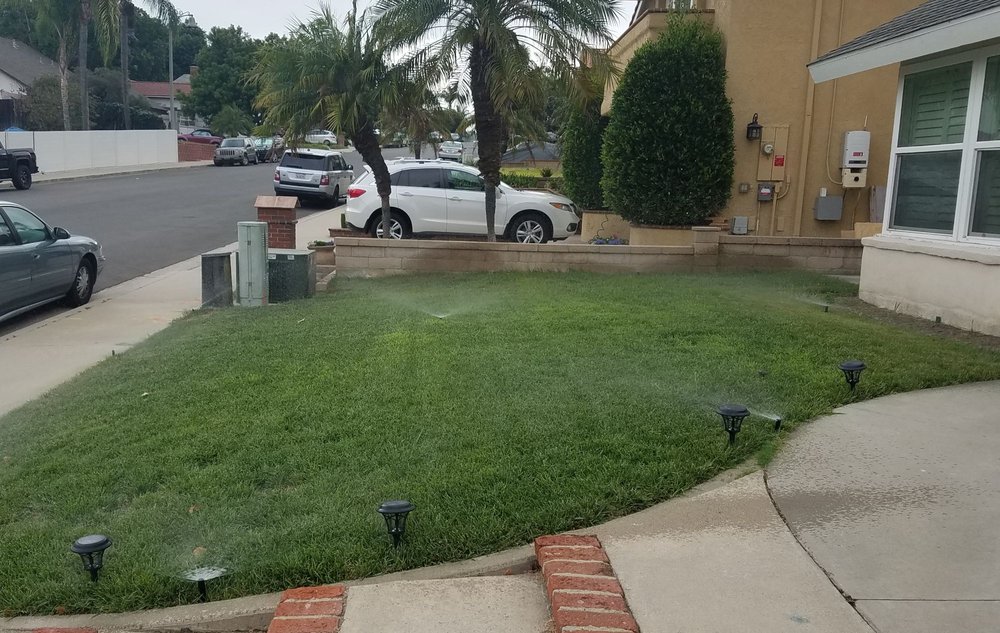
inground sprinklers on residential front lawn
How it works
Inground sprinklers are fed by your home’s freshwater system, whether it is through a well or a municipal/city system.
A supply line from inside the house is connected to a manifold, a piece of equipment that distributes the water to the various pipes leading to zones in your landscape. The manifold is usually housed in a box for protection.
Each zone is a system of pipes and watering heads. The water pressure in the pipe causes the heads to rise above the turf where they can spray water to the surrounding lawn.
The valves are controlled by a timer. The timer can be programmed for watering time and duration. Most timers are easy to program, and they can be paused, for example, if rain is expected.
Pros and Cons
An inground sprinkler system has several advantages and a few drawbacks.
Convenience: After initial setup by you or an installer, this is the easiest way for homeowners to water their landscape.
As the saying goes, “set it, and forget it.” Program the system to run when and for how long you desire, and you’re done.
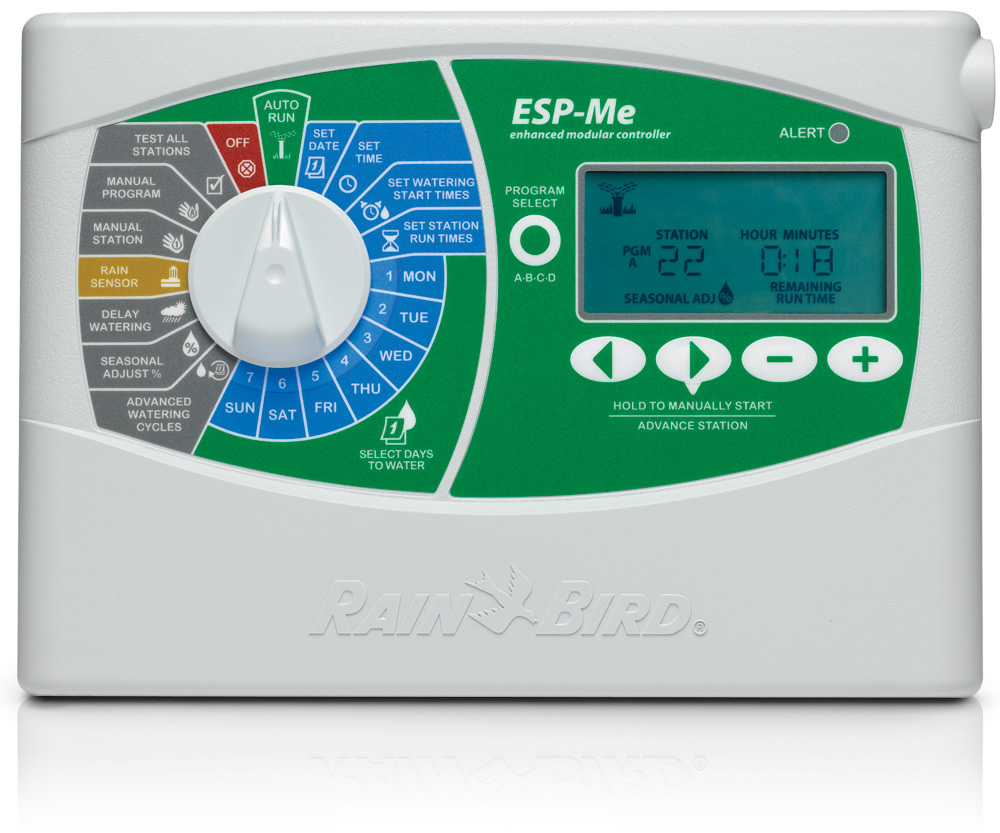
ESP-ME Rain Bird
If it’s raining, simply push “Off,” and the program is on hold until you turn it back on and resume watering on the programmed schedule.
Nighttime Watering: There are two benefits. First, watering when it is dark allows the moisture to get into the soil. Less of it evaporates than under sunny conditions, so there is less waste of water and money.
Secondly, watering at night does not interrupt your daytime activities in the yard.
Higher cost: An inground irrigation system costs more than other options.
Over-watering: We’ve all seen sprinkler systems running during a rainstorm. Not only does excess watering waste money, too much water can cause rot, fungus, and other vegetation-killing issues.
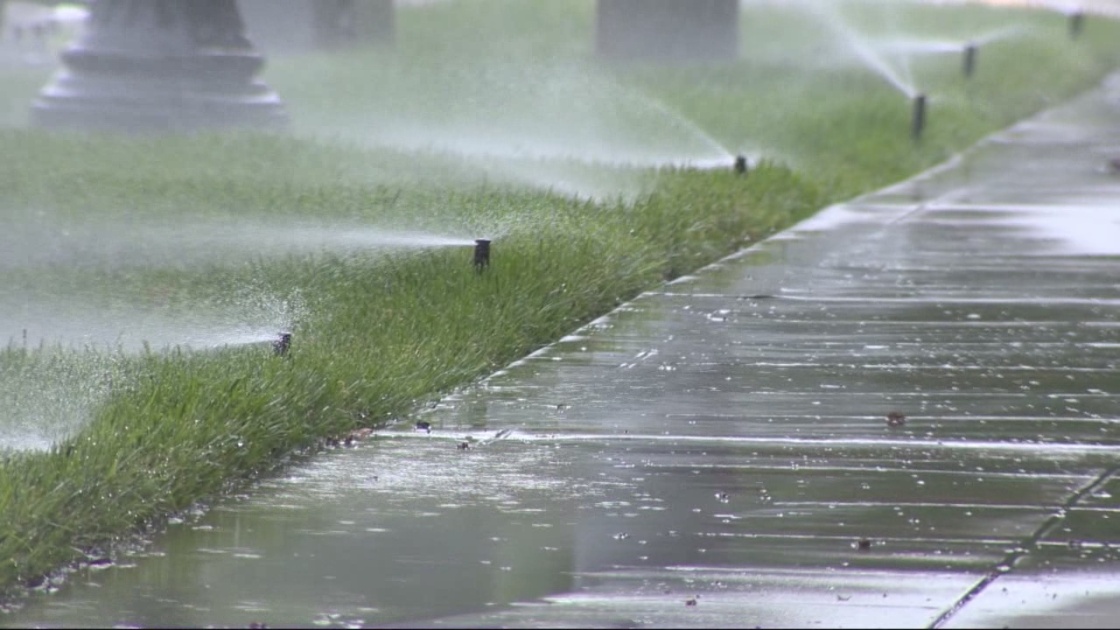
Wasted water due to over-watering
Cost
On average, a professionally installed in-ground sprinkler lawn irrigation system costs between $1,800 to $3,500. For larger and more complex landscapes, the cost can exceed $5,000.
In-ground Sprinkler Sample Project
Cost factors include the shape of the lawn, how difficult it is to trench the ground for installation and the number and type of sprinkler heads used.
This table shows costs based on the size of your lot and these cost factors:
The size of your lot: Cost goes down per square foot as the acreage increases.
The quality of the equipment used: There are basic, better, and best systems from most leading brands. Cost rises with quality, and quality gives you better durability and, in most cases, a better warranty.
Ground conditions: Open ground with soft soil like black dirt or spring clay is much easier to trench and work with than soil containing roots, rocks, and rock-hard summer clay.
Design Tips
If you’re planning to DIY or just want to be able to discuss plans with the pros, here are tips to keep in mind.
Know your Landscape: Shady areas need less water; those in full sun need extra water. Slopes lead to run-off, so should be watered more often but for short periods of time. Low areas where water naturally accumulates need less water. Sandy soil drains quickly, so it needs more irrigation than clay soil, which holds moisture.
These are a few of the landscape features to be aware of when planning irrigation zones and the placement of sprinkler heads.
Overlap Every Inch of Terrain
Your sprinkler heads should be set so that every inch of ground gets watered. If the radial heads you’re using, for example, can spray water 10 feet in all directions, they should be placed 7 to 8 feet apart for sufficient overlap.
Choose Heads for Each Zone
There are several sprinkler head types.
Most common are:
- 360-degree radial sprinkler heads are used anywhere, but often within the interior of the landscape.
- 180-degree heads are ideal for use on the property line.
- 90-degree heads are used in corners
- Single-direction heads are aimed at the base of a tree or shrubbery.
- Bubblers are placed near a large shrub or tree to thoroughly water its roots.
Go WiFi for Maximum Convenience
Sure, a programmable controller is handy, but the ultimate in irrigation ease is a WiFi controller. It allows you to monitor and control the system from anywhere. Here are two common scenarios when having remote control of the system is useful:
You are at work, and it is pouring rain. The sprinkler is running on metered water, wasting your money. Turn it off!
You are on vacation when you realize the system is off but the weather at home is sunny and scorching hot. Turn it on!
You can do either with a few clicks or taps.
Thoroughly Follow a Good Tutorial
There are many helpful written tutorials online. The best we have found is called Irrigation Tutorials. It is produced by a landscape pro who has been designing and installing irrigation systems in California since 1980, and his wealth of experience shows. The site says it is “the mother lode of irrigation information”, and we agree.
The main Irrigation Tutorials guide has dozens of links to pages on every aspect of irrigation system design such as measuring your yard, determining water pressure and GPM flow, selecting every piece of equipment from meters to valves to sprinkler risers/heads.
Above Ground Sprinklers
This system is exactly what it sounds like. Attach one end of a hose to the spigot and the other end to a sprinkler, turn on the water, and you’ve got irrigation. That’s the simplest type, but there are interesting design options discussed below.
Pros
Water Where you Want It
Is the lawn well-watered but the vegetable or flower garden need more water? Did you just seed a bare area, and it needs extra irrigation?
With a tried-and-true hose and sprinkler, you can customize irrigation more easily than with an automated inground system.
Fresh Air and Exercise
There are benefits to manual watering. The air is healthier outdoors, according to the EPA, and a stroll in the yard among the growing plants provides exercise and serenity. The smell of a watered lawn is great aromatherapy.
Timers Add Convenience and Control
Your equipment options have grown when it comes to manual landscape irrigation.
Some sprinklers have built-in timers, a spring-loaded dial rather than digital timer, that give you some level of time control. Cost starts at about $25 for sprinkler time controls.
For more versatile control, consider a faucet timer with digital control. It fits on the spigot, and the hose attaches to the timer. Set the timer, turn on the water, and you’ve got semi-automated irrigation.
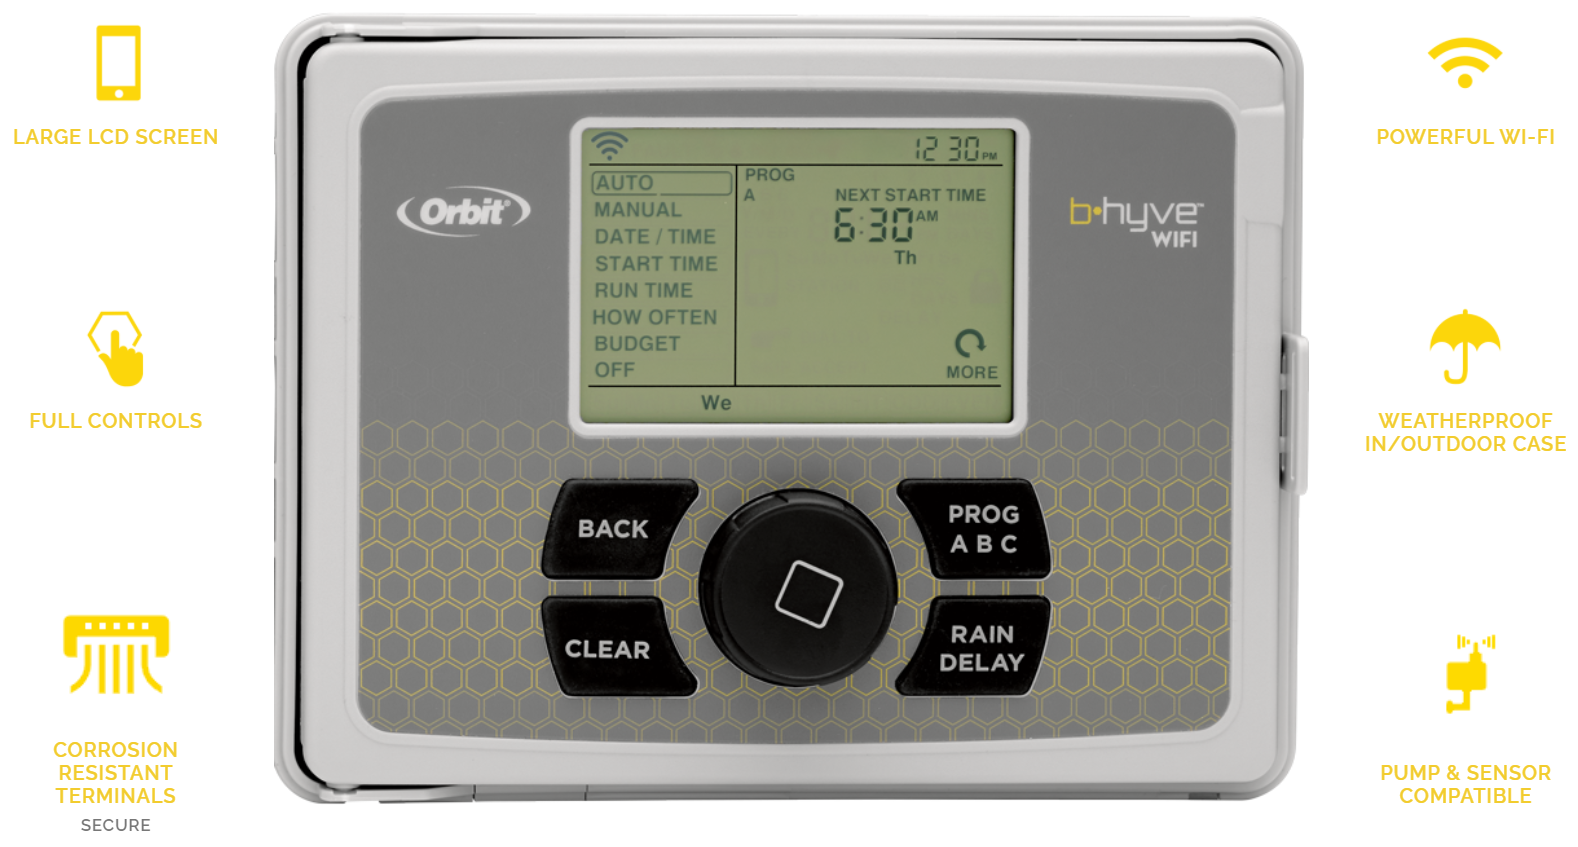
B Hyve sprinkler timer
The next step is a WiFi timer that can be controlled from your smart device using the app. It’s the ultimate in convenience whether you’re inside watching a movie or across the county on business or pleasure. The target Orbit B-Hyve is one example. It attaches to the spigot, and a WiFi hub inside your home receives control commands and sends them to the B-Hyve. This one senses rain, so will shut off to avoid unnecessary watering, and it can be programmed to meet the irrigation needs of differing soil types.
These accessories allow you to water when it is most convenient and/or effective, such as at night or early morning rather than the middle of the day or evening.
Cons
It Takes More Time and Effort
Even if you have two or more sprinklers going at once, it will take several hours to adequately water a ¼-acre yard. Time increases as the yard gets bigger. And you’ll have to monitor how long the sprinklers run in each area and move them as needed to eventually water the whole landscape.
Too Much or Too Little Water
Manual watering without a timer can be inefficient or worse.
When a sprinkler is left on too long, plants can be damaged. Soil erosion can occur. If your water is metered, the money wasted adds up quickly.
On the other hand, watering by hand can cause some areas to get too little water or be missed entirely.
Cost
A few hoses and several sprinkler heads might cost $200 total. That’s a fraction of the cost of an inground irrigation system.
Here is an itemized list of the equipment and cost:
50’ to 100’ garden hose: $35-$60
Sprinklers: Spike rotating up to 1,500 square feet, $5-$20; Sled sprinkler up to 2,000 square feet, $10-$30; Oscillating sprinkler up to 4,000 square feet, $15-$50; elevated tri-pod sprinkler, $30-$50; Decorative sprinkler, $50-$125.
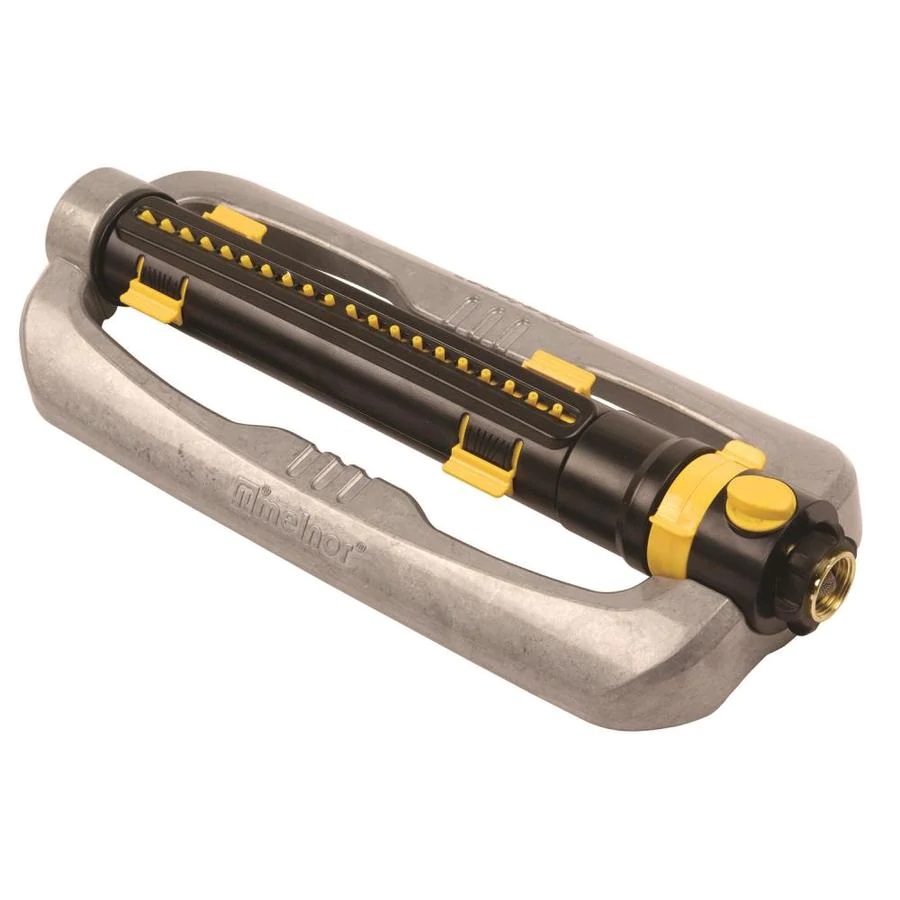
Melnor 4500-sq ft Oscillating Sled Lawn Sprinkler
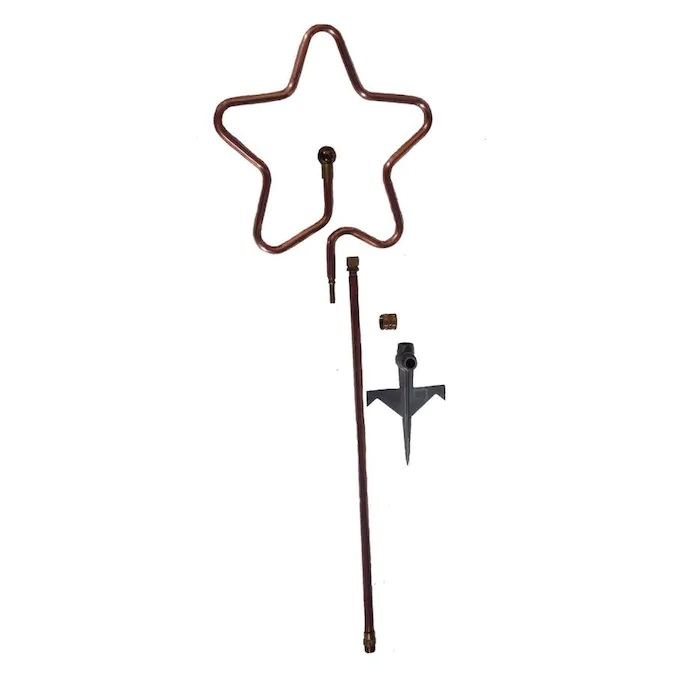
Bosmere Star 30-sq ft Rotating Spike Lawn Sprinkler
Y-connectors: $3-$5 each
Digital timer: $30-$45
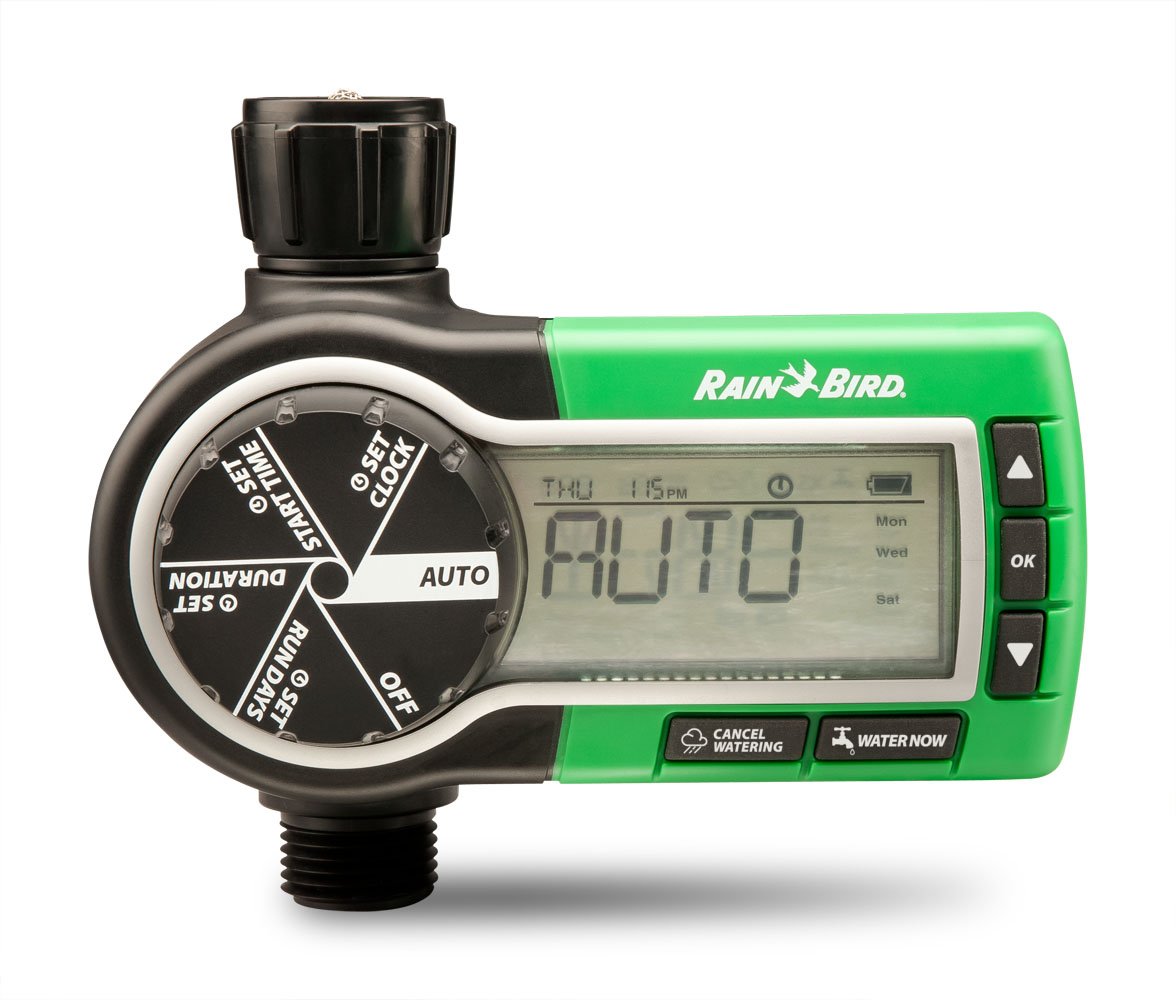
Rain Bird electronic hose timer
Water Hose timer with WiFi: $60-$85
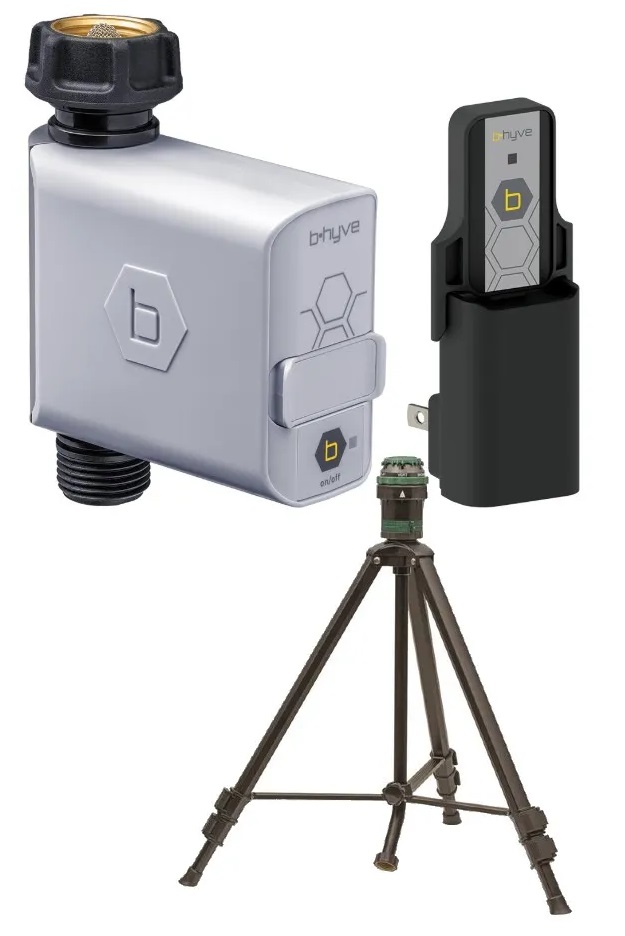
B-hyve Smart Hose Watering Timer with Wi-Fi hub, and H2O tripod bundle
Design and Watering Tips available at Orbit Online for $85-$99.
The key to manual watering is to know the size and shape of the area each sprinkler covers and how much water it delivers per hour.
- Turn on the spigot fully. Let the sprinkler run for a few minutes, and then measure the length and width of the swath that is wet. Be sure to note whether corners get adequately watered. Many back-and-forth (oscillating) sprinkler heads don’t fully water the back corners. Knowing this will help you plan to overlap your watering zones to make sure the entire landscape is irrigated.
- Place a rain gauge in the middle of the watering zone, and let the sprinkler run for 30 to 60 minutes. This will let you know how long the sprinkler needs to run to deliver the amount of water you desire. Most lawns need 1” to 1.5” of water per week. Drought-resistant grasses like Zoysia or Bermuda are found in hot regions and can bet by on .5” to .8” per week.
- It is best if the irrigation occurs in two or three sessions rather than one long session, since most lawns can only soak in about .5” per hour.
- Choose the sprinkler type needed for each zone and set it up for best watering practices. For example, a radial or oscillating sprinkler is excellent for large, open areas. An oscillating sprinkler adjusted to cover just 90 degrees (up and to one side, instead of fully side to side) is ideal for placement on property boundaries and for watering a small flower or vegetable bed. A spike sprinkler can be adjusted to water in a straight line, just right for the roots of a large tree or bush.
- Use the spigot handle to raise or lower water pressure to change the area covered by your sprinkler. In other words, turn it on full for large areas, and close it partially to adjust for smaller areas.
The better you know your equipment and its capabilities, the more effectively and efficiently your landscape will be irrigated.
Soaker Hoses
There is a lot of overlap between soaker hoses and sprinklers, so this section is brief.
A soaker hose is a hose with perforation holes that allow water to spray out. Depending on water pressure in the hose, the spray will cover up to 12 feet on each side of the house.
The hose can be laid straight for open areas, made into a loop to water tree roots or curved to fit the contours of the garden or landscape. It can even be placed between rows in a garden, with the water pressure turned down, for super-convenient, efficient watering.
As with sprinklers, a timer adds convenience and gives you precision control over the amount of watering you do.
Pros: Cost is much lower compared with an inground system; You have precise control of watering; Enjoy fresh air and exercise; Timers make it easier.
One of the coolest features of some soaker hoses is that they come in a kit with T-connectors and straight connectors. A customized soaker system design can be made by cutting the hose and using the connectors to lay out the hose system for all your landscape features.
Cons: It takes longer to water the landscape; Forgetting to turn it on might allow landscape damage; Failing to turn it off will waste water and might harm vegetation.
Cost: Soaker hoses cost $20-$40 for 50’ and 100’ hoses. Kits start at about $30 for a 50’ hose and connectors.
Watering Tips
Many of these tips are similar to the tips for above-ground sprinklers.
- Turn the spigot on full for a few minutes, and measure how wide the watering area is.
- Use a rain gauged to determine the amount of water delivered per hour.
- Be sure to overlap zones slightly to ensure that no areas are missed.
- Use the spigot handle to adjust water pressure – i.e., adjust watering width.
- Timers, including WiFi timers, can be used for convenience.
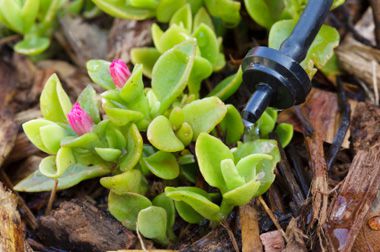
Drip Irrigation
This irrigation type is favored by water conservationists.
The system features hoses with small perforations that drip water slowly and precisely where needed with little waste. They’re something like soaker hoses, but the holes are smaller, and drips replace spray.
Drip irrigation systems are constructed with perforated PVC (better) or foam (cheaper) tubing. The tubing can be cut to custom length. Connectors and various types of water emitters can be added to customize the irrigation system design.
https://www.home-water-works.org/sites/default/files/img/plant-drip.jpg
You can buy a drip irrigation kit with tubing and a selection of emitters or you can purchase the components separately and build a very unique system.
Pros
Water Conservation
Every drop counts. Your plants get the same benefit as other irrigation types, but only 20% to 30% of the water is used.
Precise Layout
The systems are quite easy to design, and you can put water exactly where you want it – at the base of trees, along shrubbery lines, between rows of vegetables, etc.
Using a Timer Gives Control and Convenience
Like the other types, the flow of water can be controlled with mechanical, digital and WiFi timers.
DIY or Pro Installation
Many homeowners install their own drip irrigation system. However, a landscape company will do the work for you. Most supply their own equipment but might install a kit or components you purchase separately.
Cons
It Takes Time
The watering process proceeds at a drip, so most systems run for 8-12 hours to adequately water the landscape. That’s a long time for the water spigot to be out of use for other purposes.
Not Suitable for Large, Open Areas
Drip irrigation isn’t intended for large areas of turf. It is best suited to watering shrubs, flowers, trees, vegetables and similar.
Most are Installed Semi-permanently
It is awkward to lift and move a PVC pipe or perforated foam tube system. Taking it apart isn’t an option for most uses. As a result, most systems lay on the ground from spring until the end of the growing season. The pipe can be covered with light mulch, but covering it with dirt might block the holes and prevent some areas from being watered.
Cost
DIY kits are available from $50 to $200 based on the length of tubing and the water emitters included. To have a drip irrigation system professionally installed starts at about $300 and can cost as much as $1,000 based on the size and features of the landscape.
The Bottom Line
The best sprinkler system for you depends on what you want in an irrigation system. The options come down to convenience vs cost.
Convenience
An inground, programmed/automated lawn sprinkler system is the clear choice for convenience. It needs to be winterized at the end of the season in freezing climates and started again in the spring, but there is little maintenance or attention required during the watering season.
Cost
Choosing one of the manual sprinkler systems described above will save you 75% or more off of the traditional lawn sprinkler cost.
Additional Resources:
EPA’s Water Efficiency Management Guide to Landscaping and Irrigation (PDF)
Note: Here’s how we can help: 24hplans has team of highly trained, professional architects and drafters who can prepare any kind of site plan in the shortest amount of time possible, so that you can easily obtain that building permit and get on with your project. Use the promotion code: 24hplans-20off to get a 20% discount off any package. — Please note this is a limited time offer, exclusive to the readers of our blog. This offer is not being advertised anywhere else.

Inground sprinkler systems can make your life easier. However, there are some pros and cons to keep in mind. Thank you for bringing them to light!